- API Key Authentication
- Change Proxy IP
- List Available Locations
- Change Proxy Location
- Change Proxy IPv4 Rotation
- Change Proxy IPv4 Whitelist
- Append Proxy IPv4 Whitelist
- Get IP Auth info
- IOS
- MacOS
- Android
- Windows
- FoxyProxy
- SwitchyOmega
- Chrome
- Firefox
- Brave
- AdsPower
- Multilogin
- GoLogin
- Bit Browser
- Ghost
- Sphere
- Clone Browser
- Octo
- Incogniton
- Dolphin
- AntBrowser
- VMLogin
- HideMyAcc
- Accepted Payment Methods
- IP Blocking
- IP Whitelisting Authentication
- IP Rotating
- Scrapy with ProxyPanel
- Buying with Cryptocurrency
- Selenium with ProxyPanel
- Urllib3 with ProxyPanel
- Requests with ProxyPanel
- Playwright with ProxyPanel
- HTTPX with ProxyPanel
- Beatutiful Soup with ProxyPanel
Integration
FoxyProxy
FoxyProxy seamlessly integrates proxy servers into your browser, unlocking a world of possibilities previously beyond reach. Tap into the power of FoxyProxy to explore new realms of innovation, utility, and enjoyment, particularly for those of us with a passion for software.
Unlocking the Potential of FoxyProxy in Google Chrome:
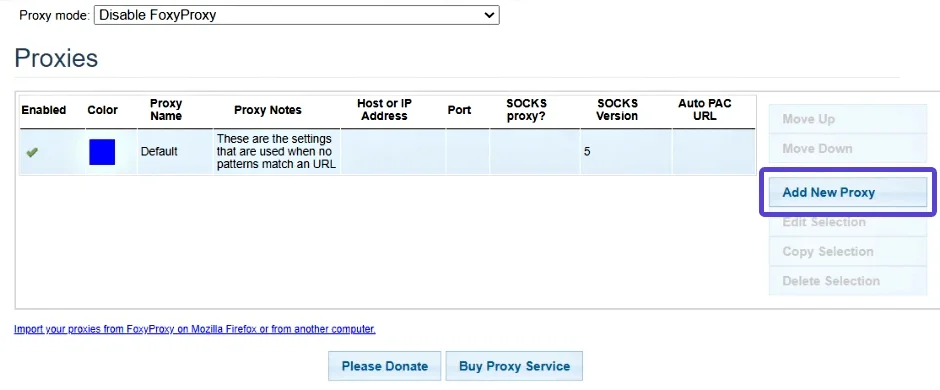
Click on the extension icon, then select "Options" from the dropdown menu.

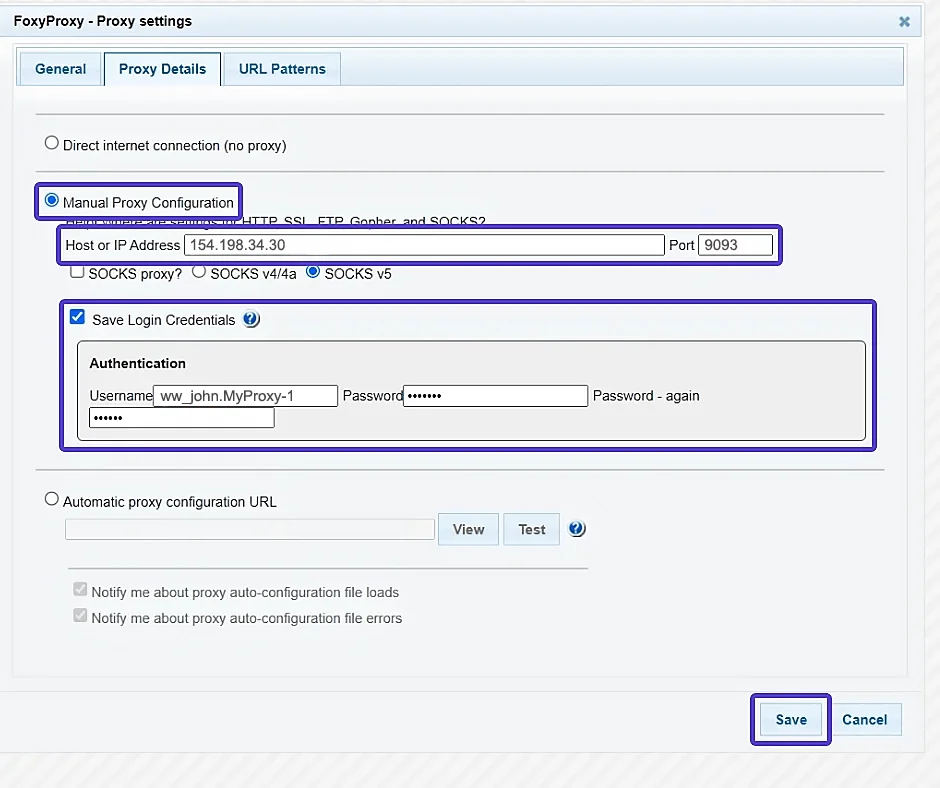
Click on the "Add new proxy" button, then choose "Manual proxy settings" from the options.
Go to your Dashboard panel and navigate to the "My Proxy" section to view your IP information.
Click on the "Show Password" button and enter your account password to display your proxy password.

Use the provided data from your control panel to fill in the proxy settings:
- For HTTP, utilize port 8083
- For SOCKS5, employ port 9093
Setting Up FoxyProxy in Mozilla Firefox
as setting up FoxyProxy on Firefox is just as straightforward as on Chrome. Experience the full potential of FoxyProxy by following these simple steps to get started. Embrace a world of seamless proxy management and customization like never before.
Install the FoxyProxy extension, then access its menu by clicking on the icon. From there, select "Options" to proceed.
In the Options window, locate the "Add" button on the left side and click on it to open the proxy settings.
Enter the required proxy details and your account information in the provided fields.
After saving the settings, click on the FoxyProxy extension icon and choose your desired proxy profile from the drop-down menu.